
Intro to Lit Actions & Programmable Key Pairs
This is an introduction guide to using Lit Actions and Programmable Key Pairs (PKPs) for a developer. By the end of this post, you should be able to mint your first PKP and use that public key to sign a Lit Action!


Overview of what we're going to cover:
- Minting a Programmable Key Pair (PKP)
- Calling the Weather API through Lit Actions, where the response is signed by the PKP
Lit Actions are immutable JavaScript programs that can be stored on IPFS. They can be signed through public and private key-pairs called Programmable Key Pairs. Lit actions can make arbitrary HTTP requests and use the data in their computation. This opens up a new realm of possibilities for smart contracts, as they can now access data from external sources such as HTTP endpoints, blockchains, state machines, and decentralized storage systems.
Requirements
This guide assumes familiarity with JavaScript, setting up a React project, and that you have a web3 browser wallet (like MetaMask or WalletConnect).
The Basics
What is a proof?
- Signing through Programmable Key Pairs (PKPs) and Lit Actions opens up the possibilities of verifying information from external sources, such as from a Weather API. Within the Lit ecosystem this signed information is called a proof.
Why is it important to obtain a proof?
- In this guide we’ll be using a PKP generated through Lit to sign an output of a Lit Action. Traditionally, when we want to send a transaction on a blockchain network like Ethereum we need to sign the transaction (using our private key), in order to validate that the origin of the transaction. In the case of a proof, we are having the data output to be signed in order to say, “hey, this information is from a trusted source!”
A PKP is a pair of public/private keys, how do I protect my private key?
- There is no need for a PKP holder to store the private key!
- Each PKP is generated collectively by the Lit Nodes through a process called Distributed Key Generation (DKG). This process permits the Lit Nodes to generate a new public/private keypair where nobody knows the whole private key. Each node has a share of a private key, and they can do everything with it that they could do with a traditional private key, like sign and decrypt data. Signing with a private key share produces a signature share.
- Lit does not store your private keys, the nodes have your key shares and only an authorized party is able to obtain the full key.
How do I use Lit in my code?
- Through the Lit JS/TS SDK!
- For Lit Actions and PKP specific documentation, check out:
- Lit JS/TS Serrano Branch SDK | Documentation Lit Actions SDK | Documentation
Okay, now that we have a few of these questions answered, let’s move on to the guide. Feel free to ask questions anytime in our discord!
The complete code and runnable example can be found in this Replit:
⚠️ This guide will solely cover the Lit specific parts of the application and will not be covering the front-end portions. We recommend starting with the Replit template or a new React project.
Create a Programmable Key Pair
1. Request MATIC from the Mumbai Polygon Faucet
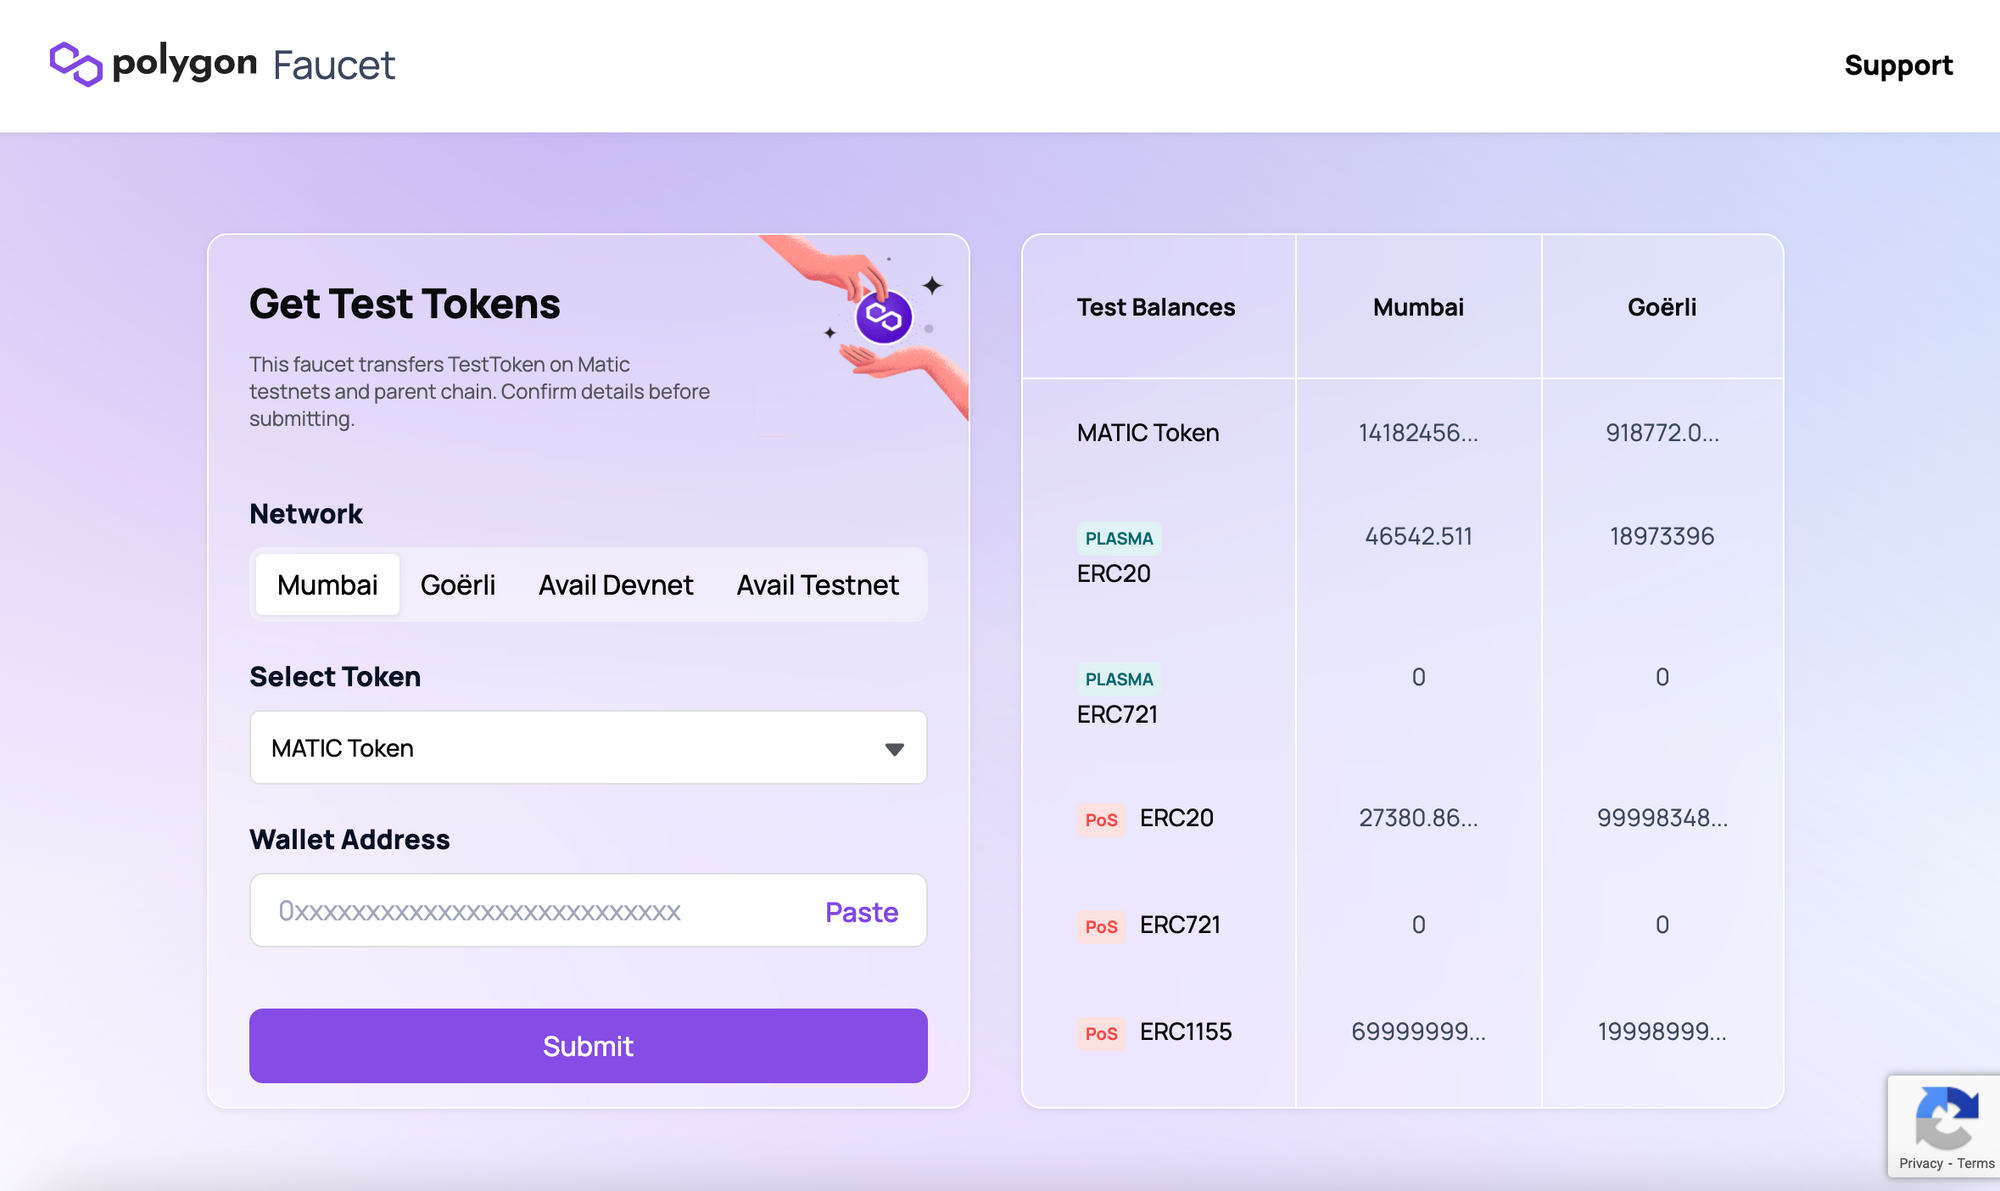
Follow the instructions on the faucet homepage to receive MATIC. Make sure to include your Ethereum address (from Metamask or another wallet) and not another network. After following the instructions, double check that you’ve received the MATIC in your wallet.
2. Go to the PKP Explorer site and mint a PKP
The PKP explorer site is the home for checking out different programmable key pairs out there and you can upload Lit Actions to IPFS within the site.
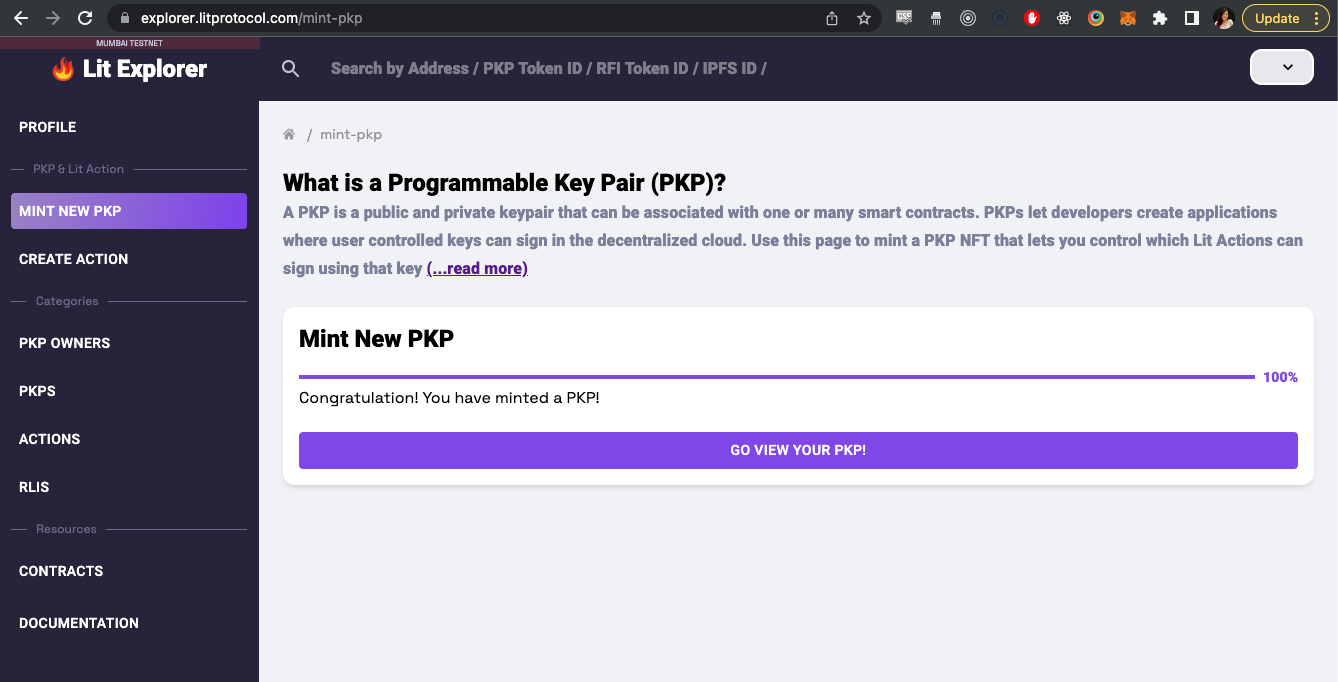
Now we have the PKP public key we can use to sign for a transaction or an output of a proof! A proof is a particular application for a digital signature. For example, using a signature to prove that a particular interaction took place.
Signing through Lit Actions opens up the possibilities of verifying information from external sources, such as from a Weather API.
Write a Lit Action
Lit Actions are JavaScript functions that can use the threshold cryptography that powers the Lit network. They are basically JavaScript smart contracts, only much more powerful.
Lit Actions are immutable, blockchain agnostic, and can make HTTP requests. This means that they can utilize on-chain and off-chain data in their computation. Lit Actions are essentially decentralized serverless functions. You can use Lit Actions in conjunction with PKPs to sign and decrypt data, functionally creating a smart contract with an associated key pair.
Load in the Lit JS/TS SDK with the Lit Actions and PKP branch
yarn add lit-js-sdk@serrano
In order to run a Lit Action with a PKP use the executeJS function within the Lit SDK. In this case, our Lit Actions function will call the Weather API and return back a signed response.
executeJs: Execute JS on the nodes and combine and return any resulting signatures
Parameters
| Name | Description |
|---|---|
code string |
JS code to run on the nodes |
ipfsId string |
The IPFS ID of some JS code to run on the nodes |
authSig AuthSig |
the authSig to use to authorize the user with the nodes |
jsParams Object (default {}) |
An object that contains params to expose to the Lit Action. These will be injected to the JS runtime before your code runs, so you can use any of these as normal variables in your Lit Action. |
debug Boolean |
A boolean that defines if debug info will be returned or not. |
sessionSigs any |
coming soon: read more |
authMethods any (default []) |
a WebAuthn signature, or an oauth token from a service like Discord or Google: read more |
Returns
An object containing the resulting signatures. Each signature comes with the public key and the data signed.
The necessary parameters for this project are code, authSig, and jsParams. The executeJS call will look like:
await litNodeClient.executeJs({
      code: litActionCode,
      authSig,
      jsParams: {
        day: parseInt(day),
        // public key of the PKP generated from step 1
        publicKey: "0x041270149148d3eece72d57471232d96308063cd16038f6f8f0daf4ce267e3e76273d02e89e482cb5e0bc944ca98df0594403021614e0a0409264cd13944000767",
        sigName: "sig1",
      },
    });
Code
This is the Lit Action code that are run on the nodes. This JavaScript code calls the WeatherAPI to get the specified weather for the given period.
Within the Lit Actions code, we pass in the data to be signed (the weather response), along with the PKP public key, and the signature name to LitActions.signECDSA .
signECDSA asks the Lit Node to sign data using the ECDSA Algorithm with the PKP’s private key share. The resulting signature share will be returned to the Lit JS SDK which will automatically combine the shares and give you the full signature to use.
Parameters
| Name | Description |
|---|---|
toSign Uint8Array |
The data to sign. Should be an array of 8-bit integers. |
publicKey string |
The public key of the PKP you wish to sign with. |
sigName string |
You can put any string here. This is used to identify the signature in the response by the Lit JS SDK. This is useful if you are signing multiple messages at once. When you get the final signature out, it will be in an object with this signature name as the key. |
The Lit Actions code for this example:
const litActionCode = `
  const fetchWeatherApiResponse = async () => {
        const url = "<https://api.weather.gov/gridpoints/LWX/97,71/forecast>";
        let toSign;
        try {
          const response = await fetch(url).then((res) => res.json());
          const forecast = response.properties.periods[day];
          toSign = { temp: forecast.temperature + " " + forecast.temperatureUnit, shortForecast: forecast.shortForecast };
          const sigShare = await LitActions.signEcdsa({ toSign, publicKey, sigName });
        } catch(e) {
          console.log(e);
        }
        LitActions.setResponse({ response: JSON.stringify(toSign) });
      };

      fetchWeatherApiResponse();
    `;
Auth Sig
You can use any EIP 4361 compliant signature (Sign in with Ethereum) for the authSig, but you must put the signature into the AuthSig data structure format.
A simple solution is to implement the SIWE library found here.
Example AuthSig creation in a utils.js file:
import { ethers } from "ethers";
import { SiweMessage } from "siwe";

const provider = new ethers.providers.Web3Provider(window.ethereum, "any");
const signer = provider.getSigner();
const chainId = 1;
const uri = "<https://localhost/login>";
const version = "1";

export async function generateAuthSig() {
  const siweMessage = new SiweMessage({
    domain: "localhost",
    address: await signer.getAddress(),
    statement: "hello! Sign for the weather response API project",
    uri,
    version,
    chainId,
  });
  const messageToSign = siweMessage.prepareMessage();
  const sig = await signer.signMessage(messageToSign);
  return {
    sig,
    derivedVia: "web3.eth.personal.sign",
    signedMessage: messageToSign,
    address: await signer.getAddress(),
  };
}
Putting all of it together - remember to update the code snippet with the PKP public key generated from step 1!
The code should look something like:
import { generateAuthSig } from './utils';
import LitJsSdk from "lit-js-sdk";
import { useState } from 'react';
function App() {
const [day, setDay] = useState("");
const [temperature, setTemperature] = useState("NA");
const [forecast, setForecast] = useState("NA");
const runLitAction = async () => {
if (day === "") {
alert("Select a day first!");
return;
}
const litActionCode = `
const fetchWeatherApiResponse = async () => {
const url = "<https://api.weather.gov/gridpoints/LWX/97,71/forecast>";
let toSign;
try {
const response = await fetch(url).then((res) => res.json());
const forecast = response.properties.periods[day];
toSign = { temp: forecast.temperature + " " + forecast.temperatureUnit, shortForecast: forecast.shortForecast };
const sigShare = await LitActions.signEcdsa({ toSign, publicKey, sigName });
} catch(e) {
console.log(e);
}
LitActions.setResponse({ response: JSON.stringify(toSign) });
};
fetchWeatherApiResponse();
`;
const authSig = await generateAuthSig();
const litNodeClient = new LitJsSdk.LitNodeClient({ litNetwork: "serrano" });
await litNodeClient.connect();
const { response } = await litNodeClient.executeJs({
code: litActionCode,
authSig,
jsParams: {
day: parseInt(day),
publicKey: "0x041270149148d3eece72d57471232d96308063cd16038f6f8f0daf4ce267e3e76273d02e89e482cb5e0bc944ca98df0594403021614e0a0409264cd13944000767",
sigName: "sig1",
},
});
setTemperature(response.temp);
setForecast(response.shortForecast);
};
const getDayFromValue = (dayValue) => {
let dayText;
switch (dayValue) {
case "0":
dayText = "Today";
break;
case "2":
dayText = "Tomorrow";
break;
case "4":
dayText = "Day After";
break;
default:
dayText = "";
break;
}
return dayText;
};
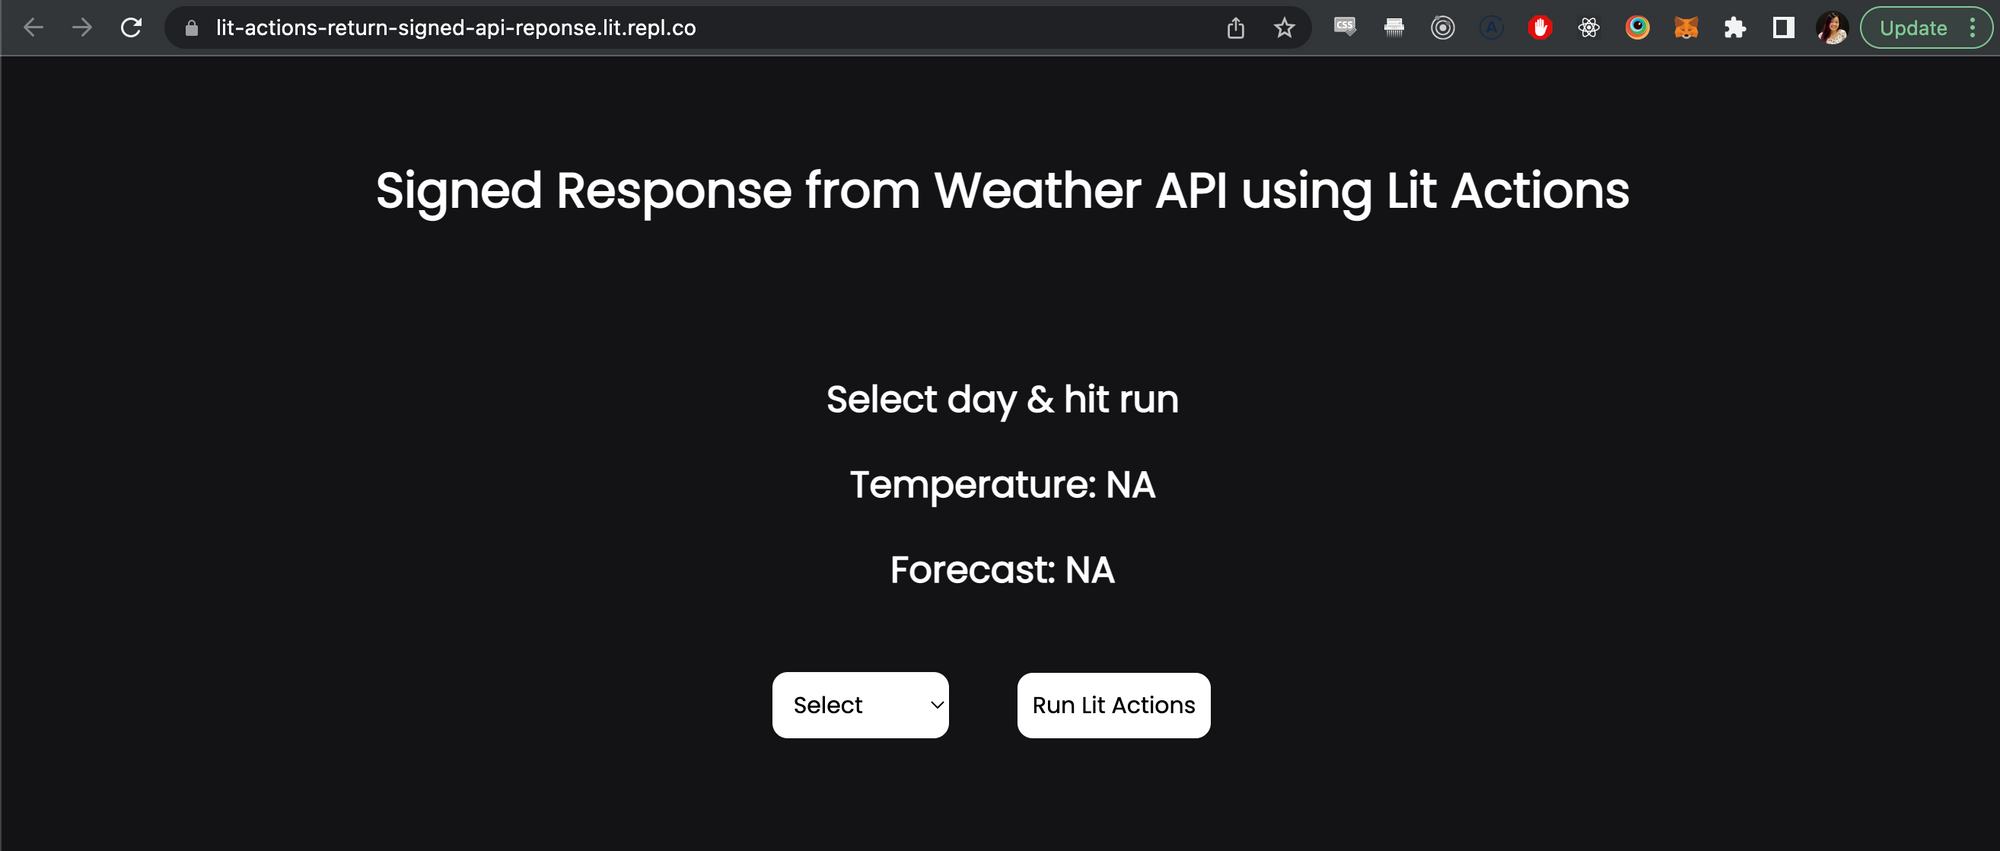
return (
<div className="App">
<h1>Signed Response from Weather API using Lit Actions</h1>
{
day === "" ? (
<h2>Select day & hit run</h2>
) : (
<h2>Day: {getDayFromValue(day)}</h2>
)
}
<h2>Temperature: {temperature}</h2>
<h2>Forecast: {forecast}</h2>
{/*
The values of the select below is hardcoded based on the weather api result.
To get the forecast for a particular day we select the array element:
0: Today's forecast
2: Tomorrow's
4: Day after's
*/}
<select onChange={e => setDay(e.target.value)}>
<option value="">Select</option>
<option value="0">Today</option>
<option value="2">Tomorrow</option>
<option value="4">Day After</option>
</select>
<button onClick={runLitAction}>Run Lit Actions</button>
</div>
);
}
export default App;
And we’ve minted a PKP and run a Lit Actions that signs using that PKP!
Additional examples to check out
Lit Actions Conditional Signing on Replit
Signs a response based on a multiple conditions. A wallet balance is compared against a user inputted minimum and there is a check that a signature is received within a 2 minute time window.
Lit Actions: Conditional Signing
OAuth with Google OAuth to minting a PKP
Read this guide to understand a proof of concept on how to mint a Programmable Key Pair and execute an on-chain transaction with only a Google account. The proof of concept guide covers the ability to authenticate an account through OAuth and have a web3 wallet abstracted away using a Programmable Key Pair.
The relayer in the article is now public and you can view the repo here.
PKP & Lit Action Possibilities
With PKPs and Lit Actions, we hope to introduce a smoother process for automation and interoperability to the dWeb.
Lit Actions in conjunction with PKPs is a fault-tolerant, immutable, and programable way to "Sign Everything". In Fred Wilson’s Sign Everything article, he states
I think we will need to sign everything to signify its validity. When I say sign, I am thinking cryptographically signed, like you sign a transaction in your web3 wallet.
In this guide, we went over how to sign a response from the Weather API — creating a proof of the response coming from the Weather API endpoint. In Wilson’s article he talks about signing for his blog on Mirror, in which he can sign his posts and it can be verified that the signature is linked to him. This allows for a more secure and reliable online ecosystem, where users can trust that the content they are consuming is verified.
See you around the ecosystem,
Deb
Additional Resources
You can find even more examples within the docs and on GitHub.
If you’re interested in contributing to the Lit community, check out the Ecosystem Proposals and Grants program.
For developer support or questions, join the Discord.